MoneyWorks Manual
Entering a Sales Order
To enter a sales order:
- In the Transaction list, create a new transaction by clicking the New button or pressing Ctrl-N/⌘-N
- If necessary set the transaction Type to Sales Order
Pressing Alt-Shift-7/Ctrl-Shift-7 is a keyboard shortcut for this.
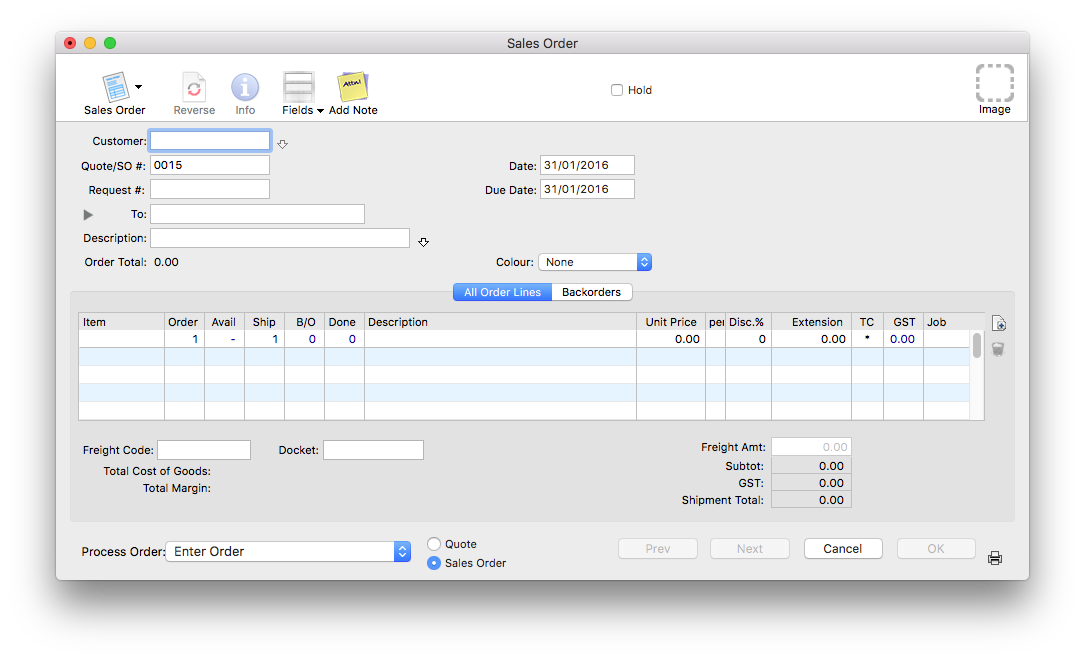
- Enter the customer code into the Customer field and press tab
The customer name details will be entered automatically.
If you do not enter a valid customer code, the choices list will be displayed when you tab out of the field. Use this to find the correct code or to create a new one.
- Enter the customer order number (if any) into the Order # field
If the Requires Order Number option is set on the customer record, you will not be able to accept the order if this filed is blank.
- Enter the date by which the customer requires the goods or services into the Due Date field
- If the goods or services are not to be delivered to the customer’s normal address, change the delivery address details —see Delivery and Mail Addresses
- Enter an optional description for the order
Depending on the design of your forms, this may appear as an annotation on your printed packing slip or invoice
- Press ctrl-tab (Mac) or ctrl-` (Win) to move to the Product code field on the detail line
Specifying product details
You need to record details of each item that you are selling. This is done in the detail lines of the sales order, and includes the quantity and code of each product required—the product description and price details are entered automatically for you when you enter a product code.
- In the Product field, enter the code of the item being sold
If you enter an invalid code (or leave the code blank), the product choices window will be displayed. You can choose the product from this list, or click the New button to record details of a new product. If you enter the product’s barcode here, it will be replaced by the stock code.
The product description and price are entered automatically.
- Enter the quantity ordered in the Order field
If the items are stocked goods, the current stock level is shown in the Avail field, and the amount that can be shipped (the lesser of the order and the avail amounts) is inserted into the Ship field, with the amount that will be backordered shown in the B/O field.
Note: The quantity shown in the SOH column is the actual stock quantity from the product record. To view the available stock (i.e. stock on hand less the quantity marked to ship on other sales orders), click the SOH column heading. The heading will change from SOH to Avail. Click on the heading again to change back to SOH. Note that the MoneyWorks will remember your preference for this when entering/viewing other sales orders.
Note: If Location Tracking is turned on, the quantity in the SOH (or Avail) column is the quantity at the designated location, not the total stock on hand.
Note: Backordered items will not be shipped, but will be held over until the items are in stock. You can override the Ship amount if need be), but you will be warned that you are going into negative stock.
- Change the price and discount if necessary
The default sell price is taken from the pricing matrix in the product record, based on the customer’s Price Code.

Note: The margin for the line being entered (as well as for the transaction as a whole) is displayed for Sales Orders and Quotes at the bottom right of the entry screen if the Show Margins option in the Document Preferences is on. This can be disabled for individual users by resetting the Show Margins privilege.
- Press ↩/return to add another detail line
If freight is to be included as part of the sale, you should specify the freight charge in the freight area —see Freight charges.
- If you want to print the sales order at this point (e.g picking list, packing slip or invoice), click the Printer icon next to the OK button.
The printer icon will be displayed on the Next and OK buttons, indicating that the order will be printed immediately one of these buttons is clicked.
- If you are going to accept a deposit for the order, or ship part or all of it, set the Process Order pop-up to the appropriate action
If you have selected the Receive Deposit with Order option, you will be prompted for the deposit details when the order is saved. As this is analogous to the Deposit on a purchase order (except that a Receipt is generated), you should read the section on Paying a Deposit with Order to understand how deposits operate and how to alter their amount or cancel them.
- If you have more sales orders to enter, click Next, otherwise click OK to save this entry and return to the sales order list
- If you had elected to print this order, the Print Form window will be displayed. Set the form to the desired type, then print it.
If you clicked the Next button, a new sales order entry screen will be displayed, otherwise the sales order list will be shown (with the current order highlighted). If you clicked Cancel, the order is not saved.
The order you have created will remain in your sales system until either you ship the goods or delete the sales order. Once all the goods ordered have been shipped, the order will appear in the Sold tab.
Note: Sales orders are not accounting transactions, and hence they can be modified or deleted at any time (provided there is no attached deposit).