MoneyWorks Manual
Defining a Part
We’ll start of by changing the existing part.

- Double click on the Part Label in the left hand margin
The Part Settings box opens. This is used to specify what will be printed in the part, or what action will take place.
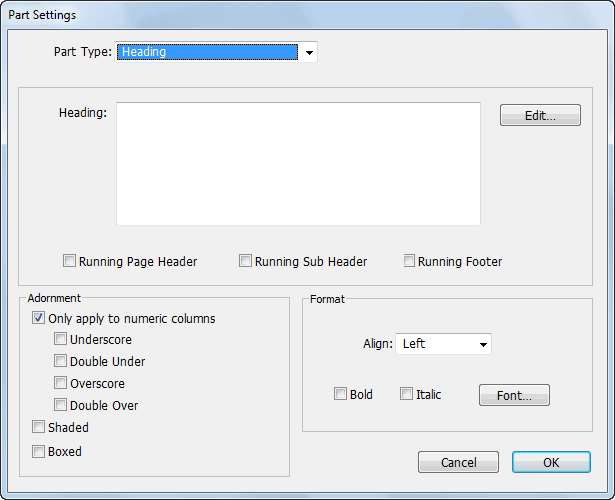
If the dialog box that opens does not look like the one above, you have probably clicked in the wrong part of the report setup. Click Cancel, and make sure you double click on the H.
This particular part of the report is currently a heading, which is appropriate as it is the first part in the report.
- Type “Gross Margin Report” into the Heading field, then click OK
The window will close, and the words “Gross Margin Report” will appear in the part we have just modified.
Adding a New Part

- Click on the Append Part Toolbar button
A new part will appear immediately under the one we have just modified. The Append Part Toolbar button adds a new part to the end of the report.
- Double click on the Part Label of this new part
The part settings box will open as before.
- Click on the Part Type pop-up menu to see the options available
This is where we specify the type of Part we want to use.
- Choose Accounts of Type
The options available change to reflect what is appropriate for this Part Type. Because we have chosen Accounts of Type, we need to specify which type. This is done in the Type pop-up menu, which contains a list of all the available account types (Income, Expense etc.) in MoneyWorks.
In this case we want to list all of the Sales accounts. The Type pop-up menu is already set to this, so we can just leave it.
Note: If the chart of accounts that you are using doesn’t have any Sales or Cost of Sales accounts, use Income and Expenses instead. The net effect will be a profit and loss report.
- In the options section, turn on the Column Headings at Top and the Totals at Bottom check boxes
These will cause headings to be placed before the account listing, and for all accounts appearing in the part to be summed and the total printed at the end of the listing.

- Click the OK button
The part settings window will be closed. The Part Label we have just altered will change to RT (short for Range by Type).
The part we have just created will list all our sales. We need to create another part to list our direct cost of sales.
- Append another part (click the Append Part toolbar button)
- Double click the Part Label to bring up the Part Settings box
- Change the Part Type pop-up menu to Accounts of Type
- Change the Type pop-up menu to CS: Cost of Sales
- Set the Totals at Bottom option, then click OK
The altered part will display in the report.