MoneyWorks Manual
Replace Commands
The replace commands will replace a nominated field in a selection of highlighted records by a constant value or the result of a calculation. This allows easy update of (for example) customer terms or a uniform price increase.
Note: Use this command with caution—it is a good way to zap your entire file.
We recommend that you save your file before using this command, then check the results carefully, and if necessary use the Revert/Rollback command —see Document Rollback or Revert to restore your file to how it was before the replace.
To replace a field
- Open the appropriate list window and highlight the records for which the field is to be replaced
- Choose Select>Replace
The Replace Settings window will be displayed.
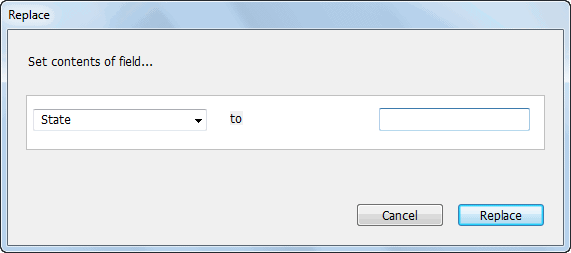
- Set the pop-up menu to the field that is to be replaced
- Enter the replacement value into the to field
- Click Replace
The selected field in each of the highlighted records in the list will be changed by the replacement value.
Restrictions
There are (obviously) restrictions on the fields that can be replaced and the values that can be entered. For example you cannot change the Gross field in a transaction (it must be the sum of the detail lines) or the dates in posted transactions. And it makes no sense to replace every item code with a single value.
Advanced Replace
In Gold only, use the Advanced Replace to update fields with a calculated result. This is useful for operations like applying a price change to a range of products.
- Open the appropriate list window and highlight the records in which the field is to be replaced
- Choose Select>Advanced Replace...
The Advanced Replace settings window will be displayed
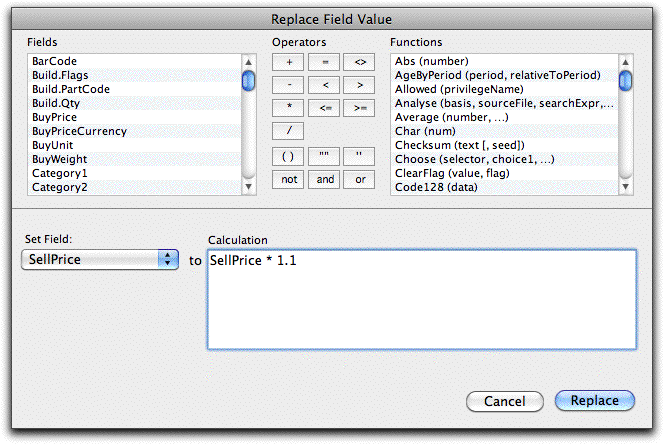
- Set the pop-up menu to the field to be replaced by the calculation
- Enter the calculation to use in the Calculation field
You can use the fields and functions in the lists if needed.
- Having checked your calculation carefully, click Replace
The selected field in the each of the highlighted records in the list will be permanently changed by the replacement value. It is a good idea to test the calculation by replacing an unused field (such as “User1”) with the results, and then if all has gone well, replace the real destination field by the contents of this field.
Examples:
| File | Field | Calculation | Description |
|---|---|---|---|
| Names | BankAccountNumber | AccountName | Copy the accountname field into the BankAccountNumber field |
| Names | AccountName | "" | Clear the AccountName field |
| Product | Sellprice | SellPrice * 1.1 | Increase the sell price by 10% |
| Product | SellPrice | round(SellPrice/5,2)*5 | Round sell price to nearest 5 cents |
| Transactions | Duedate | Date(30, Month(Duedate +1), Year(duedate)) | Set the duedate to the 30th of the next month |
Printing Records

It is possible to print out any of the lists that are displayed, just as they appear on the screen. They will print in the same order in which they appear on the screen, with the same columns1. To print a list:
- Display the appropriate list on the screen
- If necessary, find the records you want to print and sort the list
- If you only wish to print specific records in the list, highlight those records
- Click the Print List toolbar button, or choose File>Print or press Ctrl-P/⌘-P
The Print Configuration dialog box for the list appears. There may be list-specific options on this. Refer to the sections on the specific files for a discussion of the options.
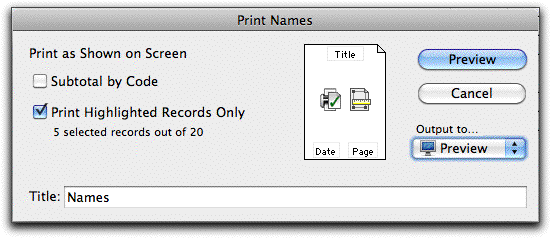
- If you want your report subtotalled, set the Subtotal option
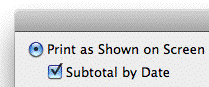
This option is only available if the list has been sorted by one of the columns. A subtotal of each numeric field in the list is printed whenever the value in the sorted column changes, with a grand total at the end of the list.
Note: Only columns with decimal alignment will be totalled
- If you only wish to print the highlighted records, set the Print Highlighted Records Only option
- If required, enter a heading to appear at the top of the report
- Set the Output to pop-up to Preview or Print
You can also save it to disk, email it, open it in Excel etc.— see Output Settings
- Click Print or Preview to print (or preview) the list
If Print is clicked, the standard Print Job dialog box is displayed.
Additional reports that can be run on the records in the list are available in the Reports section of the lIst sidebar.
1 The exception is the Transaction list, whose Gross column is automatically split into Net, Tax and Gross. ↩