MoneyWorks Manual
Adding a New Classification
- Choose Show>Classifications
The list of classifications in your system will be displayed.
- Choose Edit>New Classification or press Ctrl-N/⌘-N
The Classification entry window will be displayed.
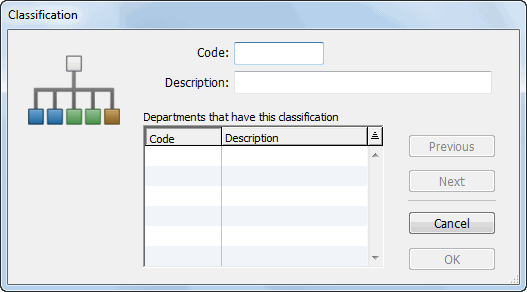
- Type the classification code into the Code field
This may be a maximum of 5 characters in length—characters can be alphanumeric—letters are automatically capitalised and spaces are converted to underscores—the “@” character is not permitted.
- Type a description for the classification into the Description field
- Click the OK or Next button
Classifications can only be assigned to Departments in the Department entry window — see Adding a new Department.
Once assigned the codes and descriptions of the departments assigned to a particular classification appear in the scrolling list at the bottom-left of the Classification entry screen.
Modifying a Classification: You can change the details of a Classification at any time by double-clicking on its record in the Classification list window.
Deleting a Classification: A Classification can only be deleted if no Departments are assigned to it. You will be warned if you attempt to delete a classification that has departments assigned to it—you need to change the Classification for the departments concerned, and then delete the classification