MoneyWorks Manual
Creating an Invoice for a Job
When you bill a job, you are asked what items to include in the invoice, how much to invoice and what form the invoice should take. The invoice is then generated for you (as an unposted transaction), and you have the opportunity to alter it if you need to.
To create an invoice for a job:
- Choose Command>Bill Job or press Ctrl-\/⌘-\
The Bill Job window will be displayed.
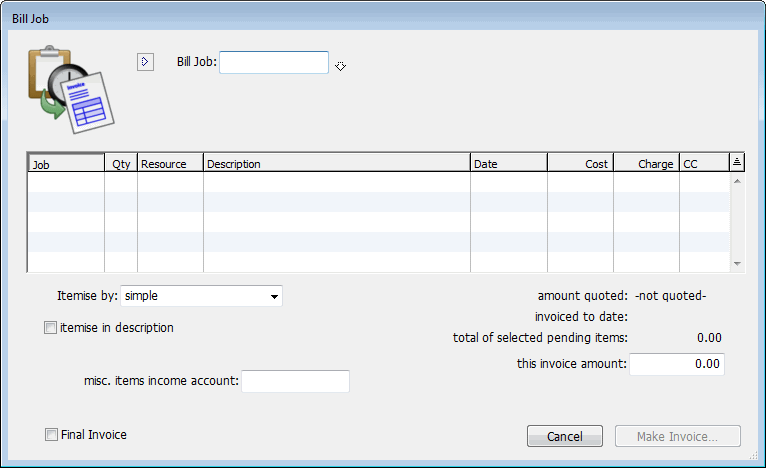
- Enter the code for the job you wish to invoice and press tab
A list of unprocessed job sheet items will be displayed. These are the items that have not yet been accounted for in previous invoices. Items in this list that are highlighted (they are all highlighted by default) will be included in the next invoice.
Note: If there are any outstanding purchase orders or unposted transactions against the job, a warning message will be displayed at the bottom of the window.
Note: If the job code is also a project code, any job sheet items for jobs belonging directly to the project will be included and able to be billed out. However the warning for unposted/incomplete will only be shown for transactions that relate to the project, not to the sub-jobs.
- Click on any items in the list that you do not wish to invoice
Whenever you click on an item, its highlighting will be turned off. Clicking on the item again turns the highlighting on.
Itemise by: There are many different ways in which you can create an invoice. You might for example just want a simple invoice that says “As per quotation”, or alternatively you might want to itemise every item used. This is determined by the itemise by pop-up menu, whose options are:
simple: A single line service invoice will be created. The income account will be that specified in the miscellaneous items income account. When the invoice is created you will need to enter the text to appear on the invoice, unless the Itemise in description option is set (see below).
date and resource: Each job sheet item is presented on the invoice in date order.
resource: Job sheet items are accumulated by resource, and a single invoice line is generated for each resource used in the job.
account: Job sheet items are accumulated by (income) account, and a single invoice line is generated for each account used in the job.
cost centre: Job sheet items are accumulated by cost centre, and a single invoice line is generated for each cost centre—you must supply a departmentalised account whose group contains the cost centres.
- Choose the type of invoice you want to generate from the Itemise by pop-up menu
Itemise in Description: It may be that you want to summarise the job sheet items memo fields on your invoice. For example:
To: Meeting with John; Site Visit; Preparation of Plans
- Set the Itemise in Description option if you want the memo descriptions carried through to the invoice
The memos made in the job sheet items will be gathered together and will appear on the appropriate invoice lines. This option is not available for all invoice types.
Miscellaneous Items Income Account: There will be situations where the income account for an item cannot be identified from the information in the job sheet items. The obvious example of this is where you are creating a single line service invoice—MoneyWorks needs to be told which income account to use. Other instances will arise where (for example) the cost centre used is not a valid department for the specified account.
To overcome this possibility, you must specify a default general ledger income account when you are preparing an invoice.
- Enter the miscellaneous items income account code
This is the default income account that MoneyWorks will use if it cannot determine which income account to use. It must be an income account, and if it is departmentalised, the department must be specified.
This Invoice Amount: The this invoice amount field contains by default the sum of the job sheet items that are highlighted. It may be that you do not wish to invoice this exact amount out (for example, there were some problems with aspects of the job that caused costs which you cannot pass on).
You can change the amount of the invoice by entering an amount into the this invoice amount field.
- If you want to make the invoice for a different amount than that calculated, enter the amount into the this invoice amount field
This is the amount that will appear on the invoice.
Balance by: If you change the invoice amount, the generated invoice may no longer add up and will need to be adjusted. You specify how the adjustment will be done using the Balance by options:
pro rata detail lines: The net value in each detail line in the transaction is multiplied by a constant so that the sum of the detail lines agrees with the altered invoice amount.
add miscellaneous items line: An additional detail line is added to the invoice. The amount of this line is the difference between the sum of the highlighted job sheet lines and the invoice amount entered. It will be positive if you have increased the amount of the invoice and negative if you have decreased the amount. You can enter whatever text you want in the invoice to explain the adjustment.
carry difference forward: Similar to “add miscellaneous line item”, except that a new pending job sheet item is also created for the difference. This can be billed out in a future Bill Job, either reducing or increasing the size of that invoice. You can use this for pre-billing, with the amount being carried forward to offset against work done.
- If you have altered the invoice amount, set the Balance by option to how you want the invoice to be adjusted.
- If this is the last invoice that you will be issuing for this job, set the Final Invoice option
The job will be transferred from active to complete after the invoice is made. Note that this does not preclude you from raising further invoices (or entering additional costs) into the job should it be necessary.
- Click Make Invoice to generate the invoice
A debtor invoice will be created (to the customer specified in the job in the job file) and displayed on the screen.
Note: If the client does not use the local currency, the charges on the invoice will be converted to the client’s currency at the system exchange rate.
You can change this invoice if required. However if you create additional detail lines in the invoice be sure to make sure that the new lines are tagged to the job, otherwise they will not be transferred through to the job sheet items file and your job profit reports will be incorrect.
Note : If you are billing items out that require a serial/batch number and which were requisitioned, the serial/batch number is not carried through onto the invoice transaction (and should not be entered there). This is to avoid double counting the item’s serial number (the same applies to stock locations).
If you need to show the serial/batch number on the invoice, you can modify the invoice form to include a Find() function that gets the serial/batch numbers from the original job sheet lines. The following for example, when inserted into a column of the form (with word-wrap on), will list up to 100 serial numbers for each product billed on the job:
    find("jobsheet.serialnumber", "resource = `"+detail.stockcode+"`
        and DestTransSeq = "+transaction.sequencenumber, 100, "\r")
See the MoneyWorks Forms Designer for more information on creating and modifying invoice forms.
- Click OK to save this invoice
The invoice will be saved as an unposted transaction (or posted if you have set the post option), and all job sheet items included in the invoice will be transferred from pending to processed (so they won’t be invoiced again).
If you click Cancel, the invoice will not be saved and you will be returned to the Bill Invoice screen where you can tinker further.