MoneyWorks Manual
Custom Settings
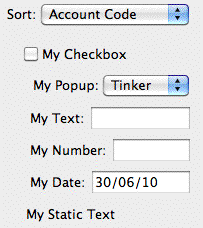
You can add your own custom controls or environment variables to your report using the Custom Settings option. Any controls created here will appear below the Sort menu in the Report Settings window, and can be set by the user when the report is run.
Controls can be Check Boxes, Radio Buttons, Pop-up menus, and fields for entering text, numbers and dates, plus just plain text. In addition you can provide scripts to control the Report Settings dialog, and a Privilege Check to control access to the report.
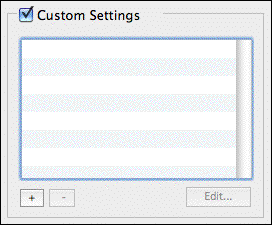
To add a custom control: click the + button
To delete a custom control: highlight the control in the list and click the - button
To move a custom control: Drag the control up or down in the list.
To modify a custom control:
- Double-click it in the list, or highlight it and click the Edit button
The Custom Control window will be displayed.
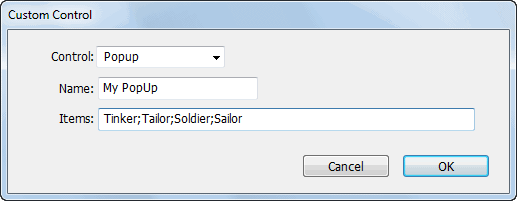
- Set the Control pop-up menu to the type of control you require
- Type the name of the control into the Name field
This is what will appear as a label to the control on the Report Settings window, and hence needs to be something meaningful to the user. It is also made available as a variable within the report, so you can access its value. Thus a name of “Number of Students” becomes the report variable Number_of_Students.

- You should not make the name too long, as there is limited space for it to display (“Number of Students” is probably a bit too long; “Student Count” might have been better).
- It is important that your name not conflict with any of the existing report variables. Thus names like “Period” or “YearEnd” are to be avoided. The existing names can be seen listed in the Calculation window, available when you click the Edit button in a report calculation.
- The choices in a pop-up menu are entered into the Items field of the Custom Control window. Individual choices are separated by a “;”. A “(-” will insert a separator into the menu. Thus:
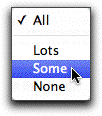
All;(-;Lots;Some;None)
results in the pop-up menu shown on right.
- The special value #PER can be supplied as a pop-up menu value, which results in a pop-up menu of periods. The value returned is the period number.
- Use the Find() function with a semicolon as a delimiter to populate the pop-up menu with data from your accounts. For example, set the Items field to the following to display up to 100 bank accounts in the pop-up menu:
=find("Account.code","system = `BK`", 100, ";", "account.code")
For more information on pre-calculated selections, see Selections.
- Adjacent radio buttons are considered to form a single group (i.e. only one button can be set at any one time). If another control separates the radio buttons, then they will operate as different groups, allowing you to use static text to give you a label, or even an invisible control to logically group your radio buttons.
Check Privilege
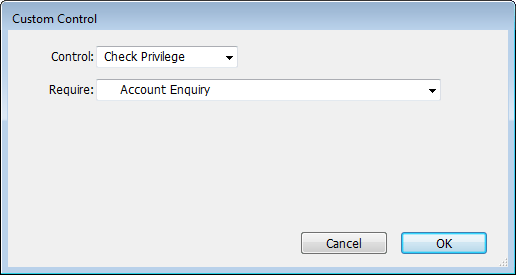
Access to the report can be controlled by a specific user privilege (as well as by signing). This is achieved by using the Check Privilege control, and choosing the privilege the user must have to run the report from the supplied list of privileges. For example, the following setting means that a user must have the Account Enquiry privilege set to run the report:
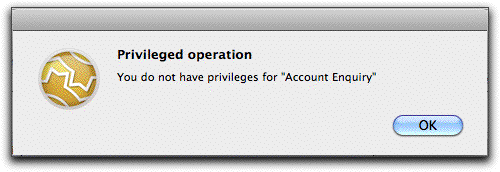
The following will be displayed if a user without the privilege attempts to run the report:
If there is more than one Check Privilege control in the report, the user must have access to all privileges specified. Note that users who do not have the Signing and Using Unsigned Forms and Reports privilege will still need to have the report explicitly signed to them.
Script
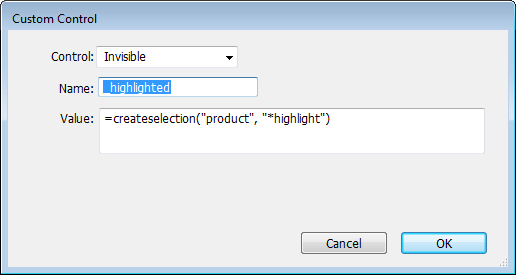
You can provide a script as a report control that can (among other things) control the highlighting of your custom controls, or provide some complex form of access control.

Note that the WindowID for the report setup dialog is F_REPSETUP.
Tip: It is much easier to write and debug a script in the script editor window than in the control window. Get it working there, and then create the custom script control and copy and paste the script text. Make sure the control has the same name as the original script, and remember to deactivate the script.
Tip: Public handlers in the report script (or any loaded script. provided the report is not being run on the server) can be seen from the report, allowing you to make custom functions that can be used by the report. For example the following handler in a script control named “repScript”:
on trickycalculation(x, y) public
would be accessed from the report by something along the lines of:
=repScript:trickycalculation(3.141, 42)
See the Recurring Transaction report, which contains a script to calculate the next recurrence of a transaction, for an example of this.
Note: You can include an on SetupReport handler in a script. This will run just before the report itself is executed, and allows you to dynamically set a column width in the report, as in the following example:
    on SetupReport
        SetReportColumnWidth("TAXCOL",if(Val("Show_Tax"), 80, 0))
    end
If the handler returns false, the report will silently abort.
For more information on scripts, see Scripts, Automation and the REST of it.